Authenticated Google Calendar API call in Java Spring Boot
| 4 minutes read
A while ago I wanted to integrate Google Calendar with Spring Boot in Java. But I didn’t want to use Spring Boot OAuth since I don’t need the Auth from it. There are a lot of tutorials on how to use OAuth2 for Spring Boot and add Google there. But this is not what we want to achieve here.
Imagine a server, where the user is already logged in, security is checked, but not over Google, over another LDAP and I just want to call the Google API to list the events the user has in his calendar.
So should be quite easy, right? You should just integrate some secrets, let the user do the auth flow, get the secret, call the API, done. Right?
Right.
But, I could not find any documentation with just this easy flow. So here it is.
The Flow
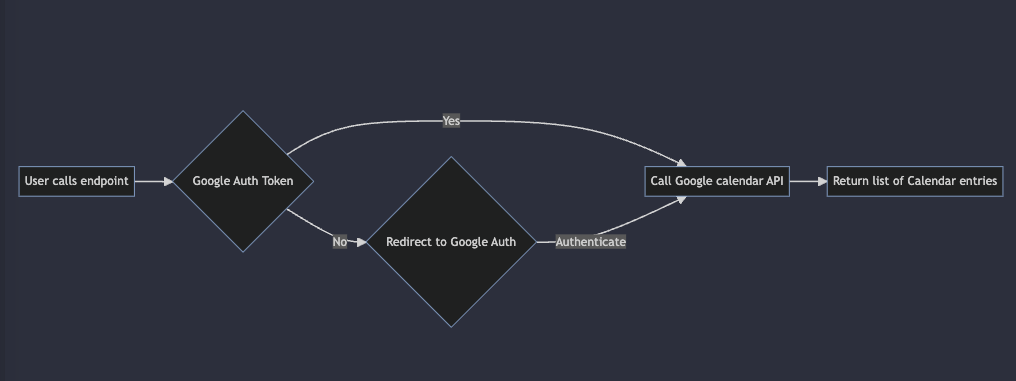
The user calls the / endpoint. If there is an auth token in the state of the server, use it to call the calendar API. If not, redirect the user to the Auth flow. The user will be redirected afterwards to the /token endpoint.
This endpoint uses the code to create a new auth token in the state and redirects to the / page. Then it starts again and checks if there is an auth token.
Attention This is not secure. The token is global and used for every callee. So this is just for testing purposes and local. There should be a security layer before the call and also a match of the token with the caller.
Generate the Google application
Getting started with the Google application. Here is the flow to get the credentials.json.
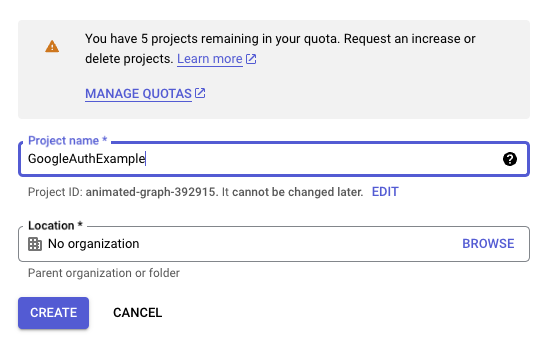
Log into Google Console
Create a new application and name it

Go to APIs and Services

Configure the OAuth consent screen
- set the application to
external - add google Calendar API scope
- add yourself as test user –IMPORTANT–
- if you don’t add yourself as test user, you cannot go through the auth flow
- set the application to
Go to Credentials
- create a new OAuth

- Web application remember adding the auth redirect URIs
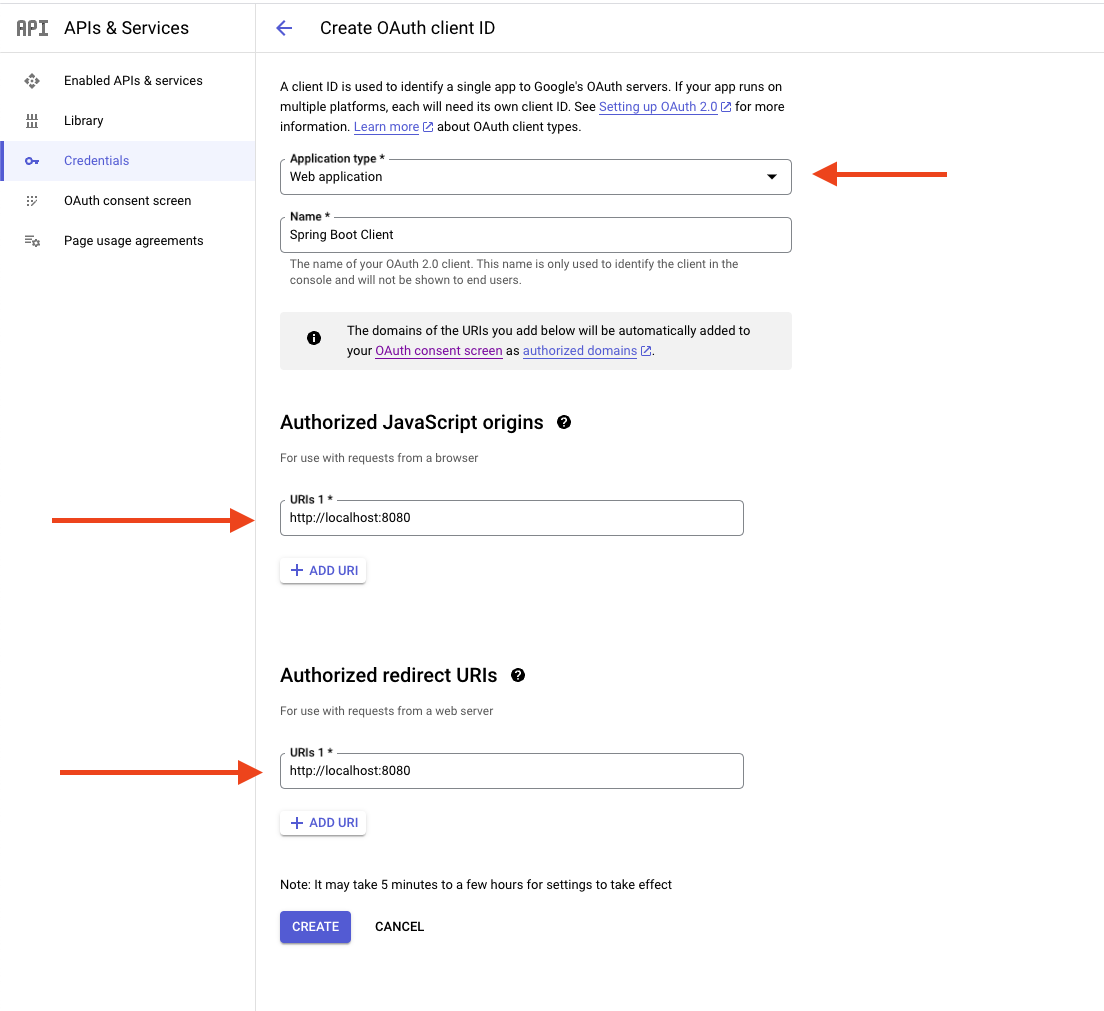
- Download json
credentials.json
- create a new OAuth
Getting Started with Java Spring Boot Code
The whole code is in this GitHub repository. I won’t go into the Spring Boot details.
Let’s see what you need to do, to get started.
Configure the Project
- Create a configuration for
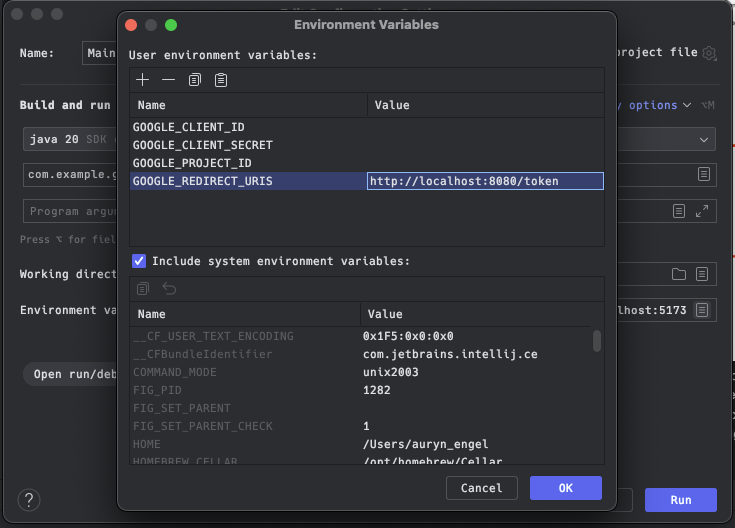
Main - Configure the Environment variables (for example where to find them in intellij)
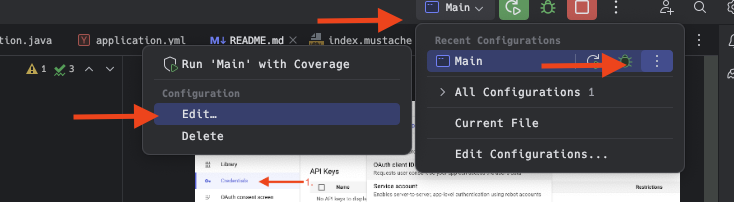
- Set these Env variables:
Code
Now you have everything set take a look at the code.
The GoogleConfiguration just contains the env variables you just configured. We use this just to have the details.
The StateService just holds the current tokens as a global state. Remember, this is not secure!! you should link this to a user and save it somewhere else.
The RouteController just check if you have a configured token. See the Mermaid diagram.
- If not
- show the login page with the redirect to Google (could also be done directly)
- If
- load the latest 20 calendar entries and show the title
Let’s take a look into the GoogleCalendarService. Here is where the “magic” happens. This is so crazy easy. (Maybe that’s why I found no tutorial 🤔).
This Service contains the fetching of the token and also the fetching of data from the calendar API.
public Optional<TokenResponse> authorize(String code) {
    val scopes = new ArrayList<String>();
    // add the calendar scope
    scopes.add("https://www.googleapis.com/auth/calendar");
    // make the request to google with the configuration
    return Optional.of(new AuthorizationCodeTokenRequest(new NetHttpTransport(), new GsonFactory(),
            new GenericUrl("https://oauth2.googleapis.com/token"), code)
            .setRedirectUri(config.getRedirectUri())
            .setCode(code)
            .setScopes(scopes)
            .set("client_id",config.getClientId())
            .set("client_secret",config.getClientSecret())
            .set("project_id",config.getProjectId())
            .set("access_type", "offline")
            .set("prompt", "consent")
            .execute());
}
And listing the entries is as simple as that.
val calendar = new Calendar.Builder(
    new NetHttpTransport()
    , new GsonFactory()
    , null)
    .setApplicationName(config.getProjectId())
    .setHttpRequestInitializer(request -> {
        request.getHeaders().setAuthorization("Bearer " + tokenResponse.getAccessToken());
        request.getHeaders().setContentType("application/json");
    }).build();
val events = calendar
    .events()
    .list("primary")
    .setMaxResults(20)
    .setTimeMin(new DateTime(System.currentTimeMillis()))
    .setSingleEvents(true)
    .setOrderBy("startTime")
    .execute();
return Optional.of(events.getItems());
Frontend
Now all we have to do is use the new data or provide them to the front end. For this, I used Mustache. This is the first time using it, but for this easy showcase, it is more than enough.
All the templates are in the resources/templates folder.
Result
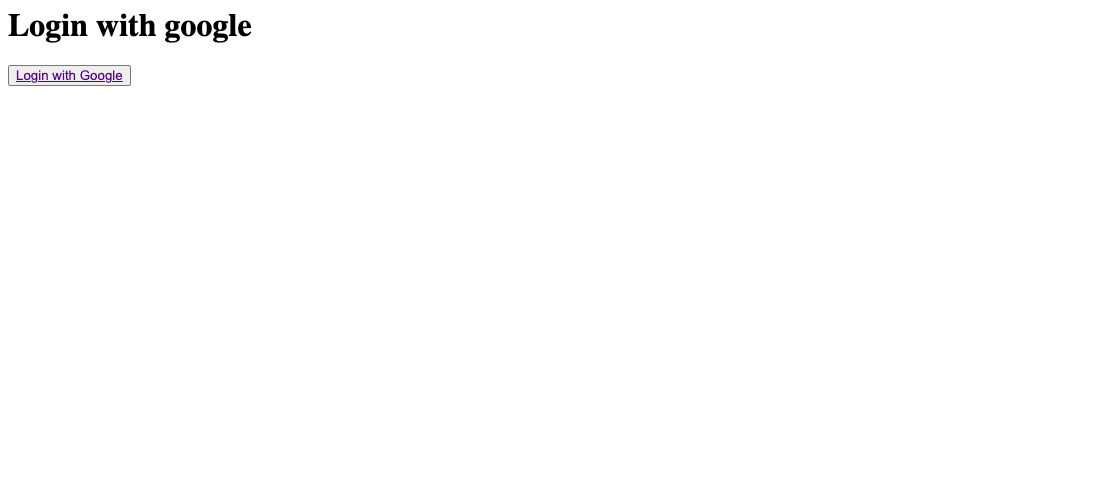
If you are not “logged in” you’ll see this basic page.
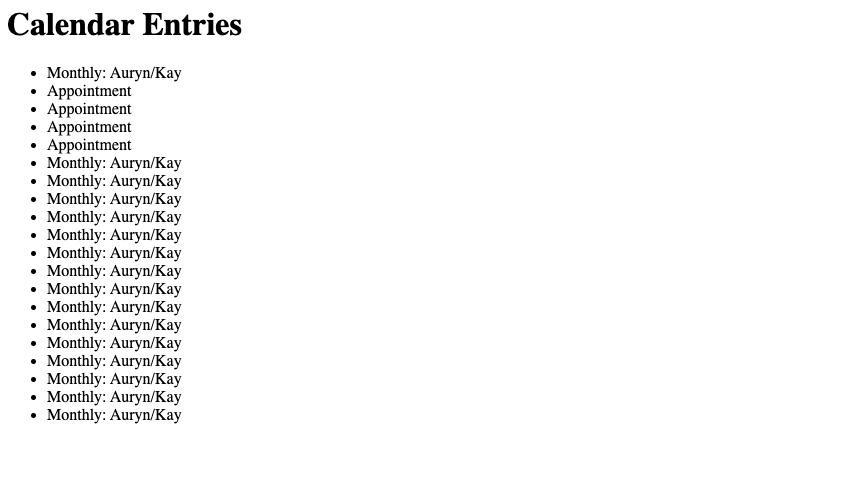
And if you go through the google auth flow, you’ll see the next 20 entries in your calendar:
Conclusion
This auth flow is so simple, that I could not find a tutorial. That’s why here it is.
Maybe this is more of a documentation for my future self.
If you have any questions, feel free to reach out to me. If you found it useful, please share.
If you want to support this blog, you can buy me a coffee ☕️ or sign-up for my newsletter ✉️